
This post introduces the usage of “Highlighting Code Block“, the syntax highlighting plugin that is compatible with both the block editor and the classic editor.
You can easily insert Code Block with just a few clicks, and they are Syntax Highlighted according to the language you select.
There are currently two colorings, “Light” and “Dark“.

It’s very easy to use code blocks with such a cool display.
The following languages are supported by default.
Other languages can be used by customizing settings and files loaded.
The syntax highlighting function itself uses “prism.js”
(with a little extra processing for better coloring).
How to install
You can download it from the plugin page of the WordPress directory.


You can also search for “Highlighting Code Block” from the Add New Plugin screen.

How to Use ?
Once the plugin is activated, the code blocks with syntax highlighting can be easily inserted in both the block editor and the classic editor.
- In the Block Editor, you simply call a dedicated block and write your code. (There are some settings that can be set for each HCB Block.)
- In the Classic Editor, simply call up the code box from the toolbar at the top of the editor and enter your code.
How to Use in the Block Editor
Here’s how to use this in the block editor which is the new editor from WordPress 5.0
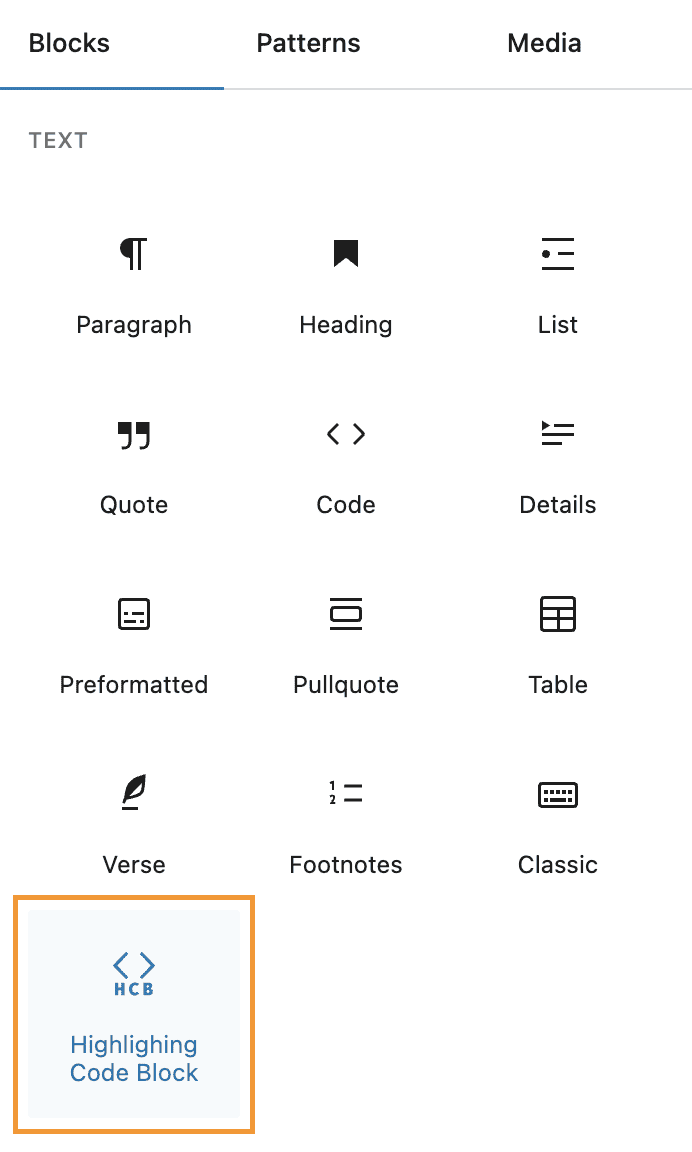
In the editor, if you click the “Insert Block” button and you will be able to select a block called “Highlighting Code Block” from the “Text” category.
The / shortcut key allows you to search for /hcb or /code.
The video below shows how to use HCB’s Code Blocks
About Block settings
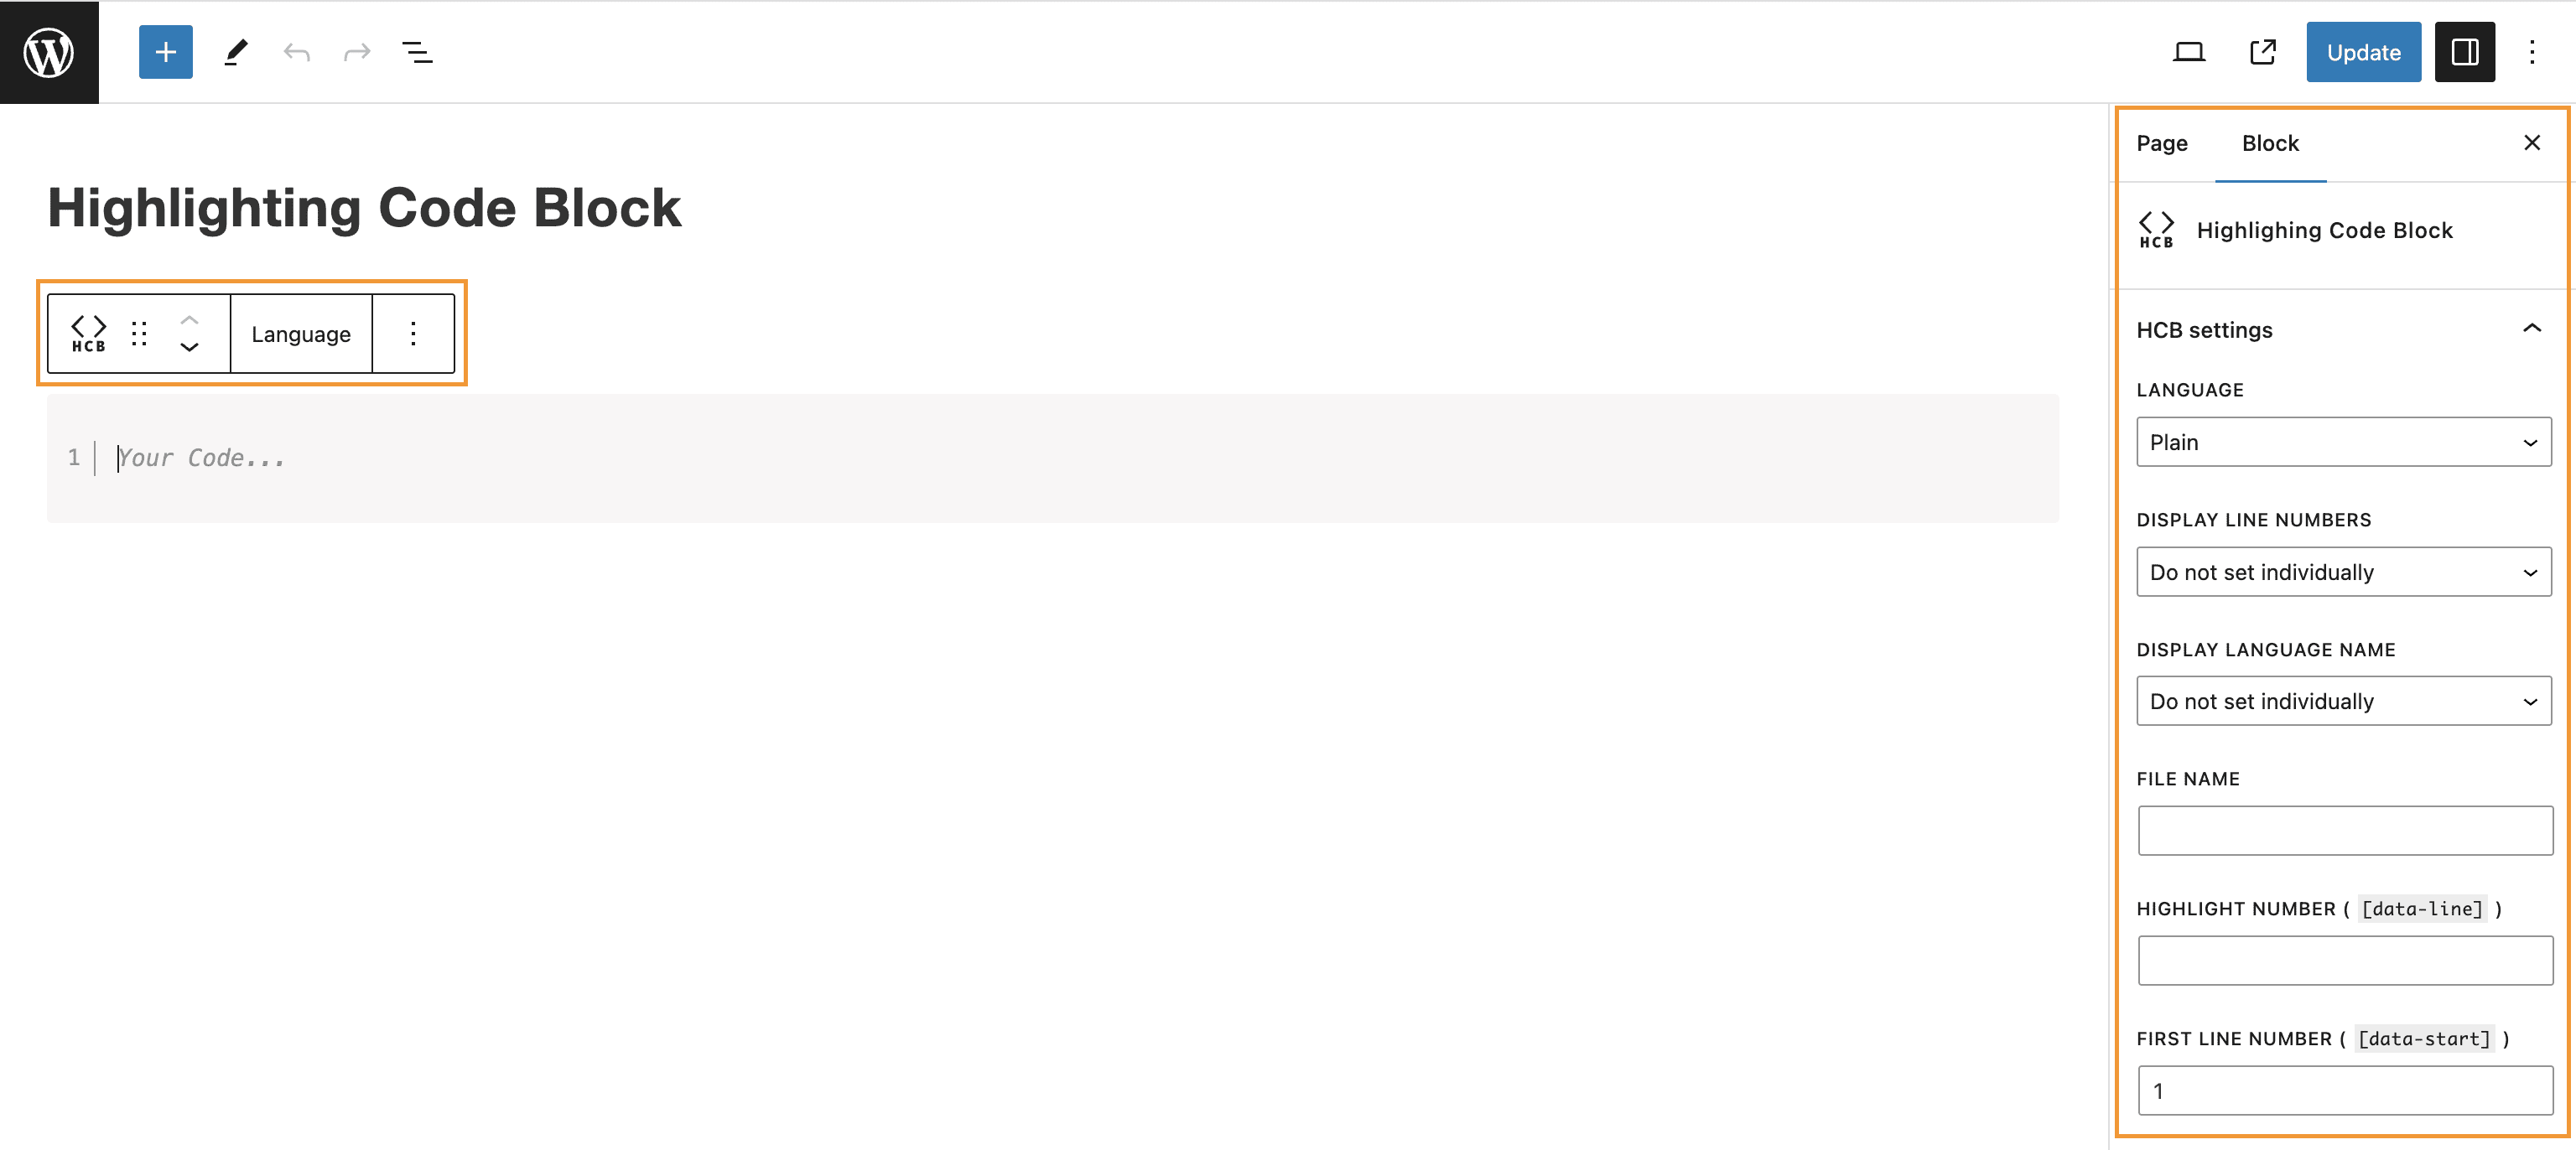
The Block toolbar and Block sidebar each have the following setting items.
Language setting
Choose the language of your code for proper syntax highlighting.
Display line numbers
Whether to display the Line numbers
You can set default values on the [HCB] Settings page, but you can override them on a block-by-block basis.
Display language name
Whether to display the Language name
You can set default values on the [HCB] Settings page, but you can override them on a block-by-block basis.
File Name
You can display the File name at the top right of the code block.
File name display takes precedence over Language display.
Highlight Number
You can set the line number you want to highlight.
For details on how to specify line highlights, please refer to the “Line highlight: How to use” page.
How to Use in the Classic Editor
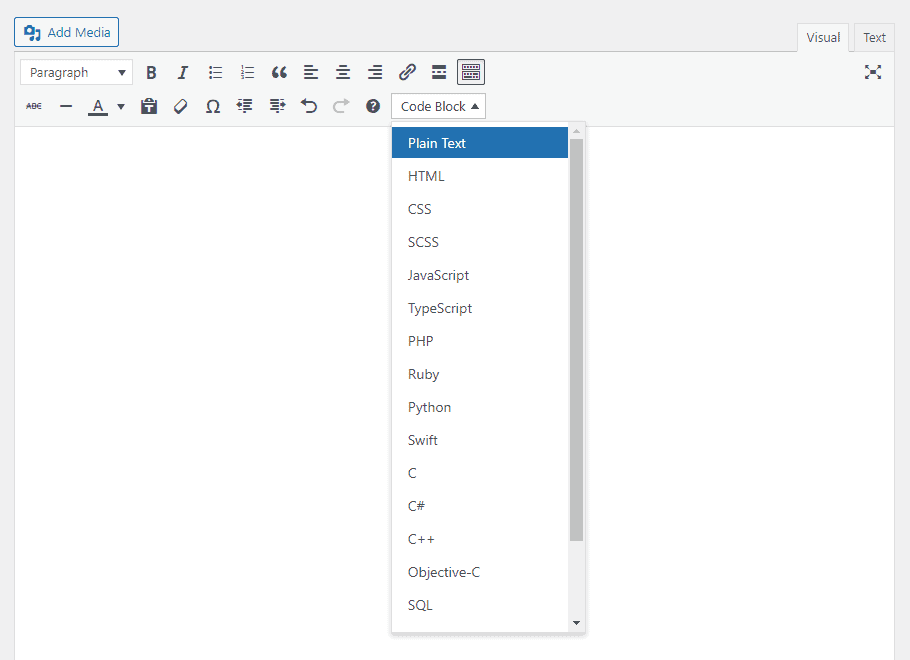
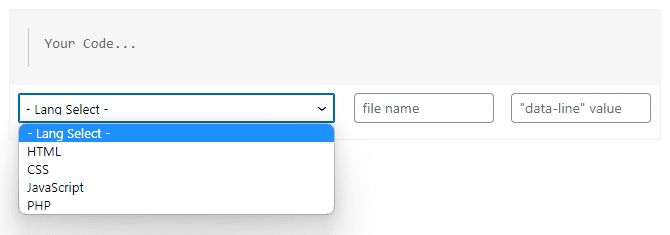
You will see a select box labeled “Code Block” added to the toolbar at the top of the editor (If the second level is hidden, use the “Toggle Toolbar” button to make it visible).

This select box allows you to choose your preferred language.
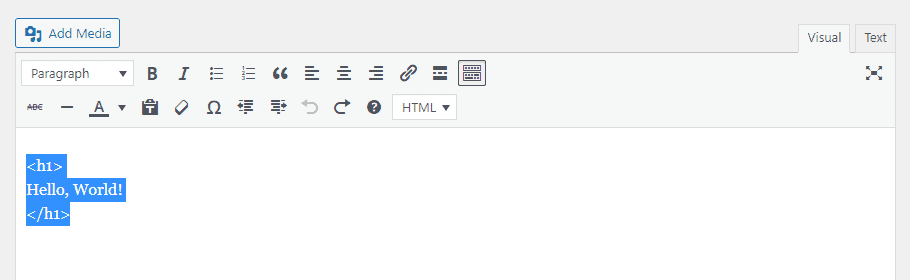
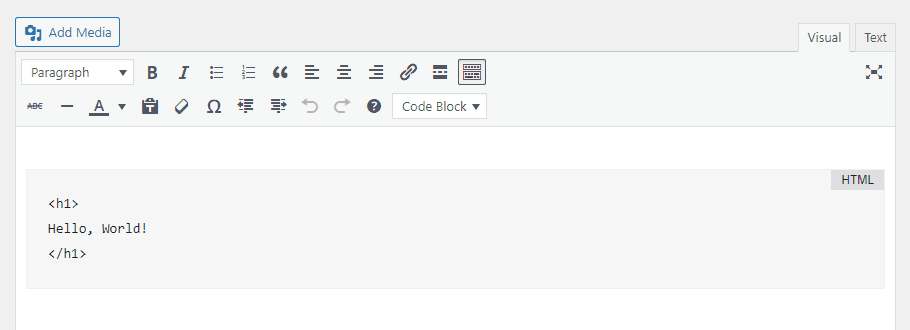
If you select “HTML”, the code block is inserted as shown below.
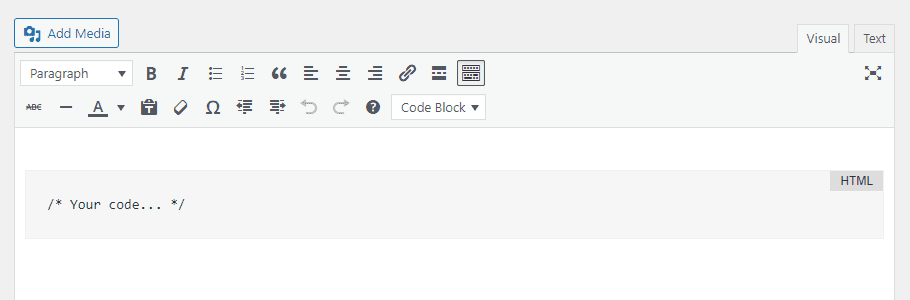
Delete the/* Your code... */ part and write your code.
It is also possible to select the code block with code already written in the editor and with them selected.
If you select a language from the select box with a selection, the selection is wrapped in a code block as shown below:
How to use line highlighting
To specify line highlighting in the classic editor, apply the data-line attribute directly to the pre tag in the text editor.
Please refer to Line highlight: How to use page for how to specify the data-line attribute.
How to get out of the code block
You can’t get out of the code block by using the enter key to repeat a line break within the code block.
Use the “→” or “↓” cursor keys to exit (or you can also “hold down the Shift key and press the line break”).
Note on Copy & Paste in the classic editor
When copying and pasting code into the code block in the classic editor, use Shift + Ctrl + V paste instead of the normal Ctrl + V paste.
Or, right-click and select “Paste to Match Style” to paste.
Also, when copying and pasting code that spans multiple lines, it will not paste properly into the code block if blank lines are included in the text.
OK (no empty line between h1 and p tags)
<h1>
    Hello, World
</h1>
<p>hoge</p>
NG (empty line between h1 and p tags)
<h1>
    Hello, World
</h1>

<p>hoge</p>
If you want to insert long code, switch to the “text editor” and paste it into the pre > code tag.
About settings
Below is a brief description of the various settings for this plugin.
Settings for “Highlighting Code Block” can be made from the “[HCB] Settings” item in the “Settings” section.
!["Settings" -> "[HCB] Settings"](https://loos.co.jp/wp-content/uploads/2022/10/hcb_setting_menu_en.png)
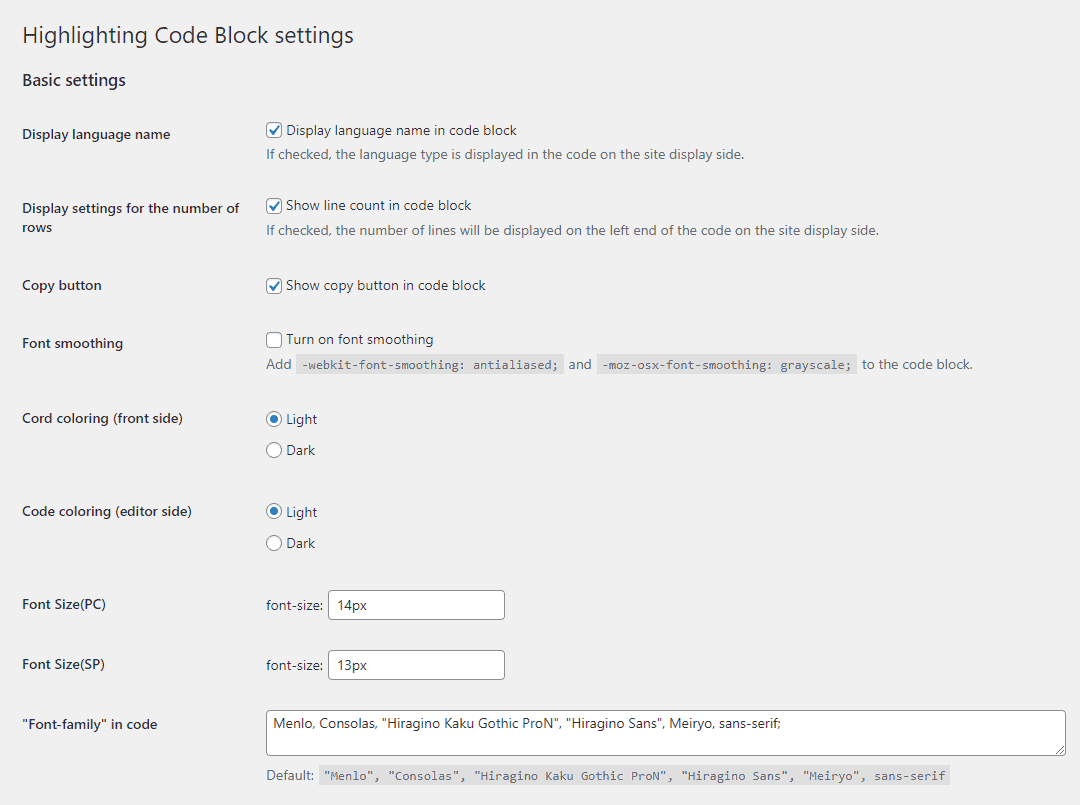
Basic settings
The basic functions include the following settings
- Display language name: Whether to display language name in the code block (Default: Show)
- Display settings for the number of rows: Whether to show line countin the code block (Default: Show)
- Copy button: Whether to show copy button in the code block (Default: Show)
- Font smoothing: Font smoothing toggle (Default: Off)
- Code coloring (front size): Code coloring in the front end (Default: Light)
- Code coloring (editor size): Code coloring in the editor (Default: Light)
- Font Size(PC): Font size of code (PC) (Default: 14px)
- Font Size(SP): Font size of code (SP) (Default: 13px)
- “font-family” in code: Font family of code (Default: Menlo, Consolas, “Hiragino Kaku Gothic ProN”, “Hiragino Sans”, Meiryo, sans-serif;)
Advanced settings
Next, below is a description of the “Advanced Settings” under “Basic Settings” follows.
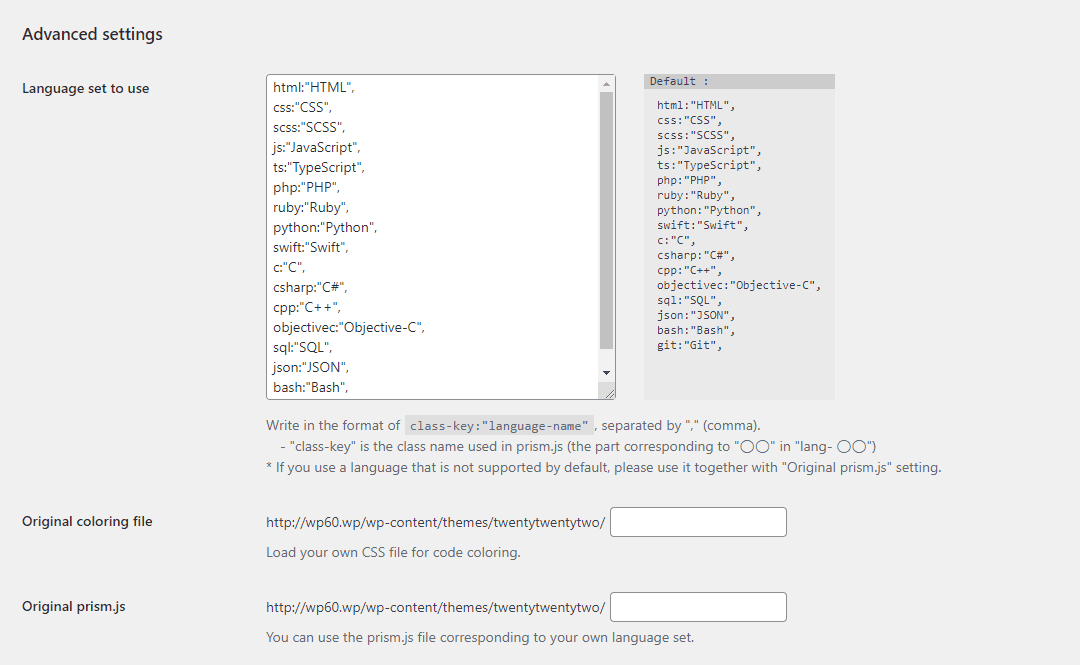
How to use fewer Language sets
Edit the contents of the “Languages set to use” field and delete any unnecessary language lines.
For example, if you set up the following:
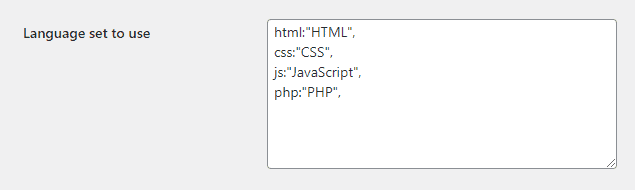
The language displayed in the language selection select box in the code block will be reduced to match the above settings.
How to support more Languages
To increase the number of Languages that support syntax highlighting, please edit the “Language set to use” in the HCB settings page.
Enter a list of supported languages in the format classname: "Display name", separated by ,.
Example: How to make Perl and Go selectable as well
html:"HTML",
css:"CSS",
... other langages ...
perl:"Perl",
go:"Go",
Please specify the class name that corresponds to each language as specified in prism.js. (Please check the Prism:Supported languages page for details.)
Next, customize the prism.js file (script that performs syntax highlighting) that is loaded by the plugin.
- On the prism.js customization page, check the language list defined in Step-1.
- Download the JS file at the bottom of the customization page above.
- Upload the downloaded file ( prism.js ) inside the Theme folder you have activated.
- Enter the path to the uploaded file in the “Advanced settings” -> “Original prism.js” field and save the settings.
By setting up to this point, you will be able to use your own prism.js file with your own language set.
Languages other than those supported by default can also be used.